🪑 Fold, Store, Impress — Your space’s new power move!
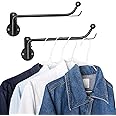
This 47.2" x 20" fold-down wall-mounted table features a 1" thick teak veneer top and ultra-strong 14-gauge steel brackets with a powder-coated finish. Engineered to support 5 times the weight of standard folding tables and fold down to a slim 1.75" profile, it’s the ultimate space-saving solution for garages, home offices, kitchens, and more.


| Base Type | Leg |
| Number Of Shelves | 1 |
| Item Dimensions D x W x H | 19.69"D x 47.24"W x 7.87"H |
| Item Weight | 28.2 Pounds |
| Size | L47.2" * W20" |
| Maximum Weight Recommendation | 28.22 Pounds |
| Frame Material Type | Metal |
| Top Material Type | Teak Wood |
| Material Type | Metal |
| Color | Teak Color Desktop & Black Folding Brackets |
| Shape | Rectangular |
| Style Name | Modern |
| Finish Types | Powder Coated |
| Furniture Finish | Alloy Steel, Teak |
J**N
Recommended
Love it! Perfect for small bedroom for daughter to do homework or draw. Sturdy material and easy to install
L**N
Could be better
*UPDATE* Seller offered to refund for the whole price. I appreciate that they reached out so I'm going to bump up my rating. The table is still holding well so there's no issue there. Hopefully they will fix the quality on the screws so this won't happen to anyone else. Other than that I like everything about the product.PAST REVIEW: Went to install the product and pre-drilled the holes for it but two of the screws broke right at the head. Luckily we had others at home that were better quality to replace them but now we have two broken screws stuck in our wall. As for the actual table it seems to be holding up well with a decent amount of weight on it but time will tell if it lasts.
J**N
OK item just hard to install
Really a hassle to install if you dont know what you're doing. You have to mount the brakes on the countertop manually as there are no predrilled holes. I am assuming that is to allow for different lengths in between studs. My particular installation area was difficult to determine where the studs where and after about an hour and a half of evaluation I choose to abort and return the item. Yes it's my fault for not identifying where my studs were but I didn't want to drill tons of holes in my wall to find them. I did use a stud finder but wasn't confident enough to actually drill.
L**Y
mounted table.
I wanted this for folding clothes in the laundry. It works great. super sturdy. Exactly like pictured on Amazon. Needed more instructions and reached out to seller to sent me all kinds of information. Highly worth the money.
H**F
Folding table
I use it in my small laundry room as a folding table. It works amazingly.
V**C
Consider Same Assembly/Cheaper/Better Custom Approach
I wish I had understood floating desk mechanics better before I bought this, and that the pics had been more clear.The only thing that really matters are the hinges. The whole assembly is to anchor them deeply to a stud, and these are pretty good, but they’re overpriced and, although i haven’t put nearly 200lbs on them, they don’t remain entirely flat and the desk eventually gets to slight angle.Plan on measuring and leveling with precision to set the hinges (think long L shaped brackets that fold up to a 90 degree angle, then down to parallel to the wall) because the slightest misalignment means the desk won’t fold into the rails properly.Once they are squared away, it’s just four screws from underneath, puncturing the wood and affixing it in two spots to each rail.This board is about 3/4ths of an inch thick and it’s very hard with a sheer, almost plastic coating. So, the edges are pretty severe. To me, the pics make it look kind of rounded but it’s very much the opposite. You can scrape your arms on the top if you slide them over it. It’s also small, even though it’s larger than most other options. I can fit a latop, notebook, coffee cup, and not much else.The depth is probably the biggest problem because it’s not enough to comfortably put your elbows atop and you have to pin your forearms into the hard top edge. You could get a child proofing rubber strip for the top edge, I suppose.Bottom line it’s not a great desk. It’s fine as a counter top, but even if you’re working with minimal space, my suggestion would be to buy just the hinges (whether fold down or up) for $30-$40 (perhaps less) then just select a softer, more comfortable, deeper board to attach to the rails. The length is mostly irrelevant since you need to attach the rails studs. The depth shouldn’t be more than twice the length of the hinge of risk bending at the end.I had to buy a different desk just for adequate space and comfort and raised this up to be a low budget, but effective, standing desk option.Seems like a DIY solution but it’s really not. The board and hinges are totally separate items. You could use a surfboard or thick cookie sheet, if you wanted.
N**G
The missing instructions
My apartment lacks counterspace, so this was looked at as an alternative. I have a dog kennel in the corner of the kitchen so this was installed above it. As other reviews have said, the screws provided are absolute garbage. I broke three of them trying to attach the brackets to the wall.The instructions aren't great either, but it's just two brackets and a slab of wood. Here's what you need to know:1) Buy new screws. I used size 6, 2 inch screws. Picked up 8 of them at the local hardware store for $0.20.2) Install this into studs. It comes with drywall achors but don't kid yourself. There's good weight to just the slab. Use a stud finder and center it up.3) I found using a laser level the easiest. Set the level and use the stud finder to mark it off at desired height (I went with counter height).4) Pre-drill holes into the wall studs for the brackets. Start at the top. Using your laser level, you can make sure these are straight up and down. Secure the top ones first, then line up with laser, then drill your lower holes.5) Once both brackets are up, put the slab on top. Slide it all the way against the wall. Then measure from either side of the bracket (close to the wall) to the edge of the slab on both sides to center it. Do the same measurements from the bracket to the edge on the edge opposite the wall (to ensure they are straight).6) Pre-drill holes from the bottom. Start closest to the wall. Then had tighten the screws thru the holes with the provided short screws. They seem to work fine for this part.And done! Enjoy the new shelf.
T**Y
You can add to dry wall FYI
It states to put it on wood studs or concrete/brick. Where I wanted it did not have any of this. Just drywall (thick drywall) . My brother is a carpenter and he added the plastic drywall securing things and added a stronger one to the third bigger hole that was there but of no use in the instructions. That secured it very well to the wall and it’s working great. If that changes I’ll be sure to update.
Trustpilot
1 week ago
1 month ago